Tuesday, March 31, 2015

Plan B - My pillow for March FMQ Challenge

Em, of Em's Scrapbag, calls it a Plan B when you use blocks made for a different purpose in a new project.  I like that.   Here's my Plan B pillow, made for the March FMQ challenge.

March Pillow for FMQ CHallenge

And here's how it started.

The ideaAfter a demo and presentation of improvisational piecing at the Modern Mini-group, I wanted to try something more abstract than my usual.

At the time I had just finished Jenny's Welcome Spring stitchery design and thought I could improvise some borders, so I gathered some fabric scraps that would coordinate.

After playing around a bit, I had created a border that I thought looked interesting on it's own but ... absolutely horrible next to the stitchery.

I considered (and dismissed) a few ideas for using the improvised strip with the stitchery.


My Improvised Border   Ugh


Plan B

And then, Plan B was born.

I put a simple print border around Welcome Spring and combined my improvised border with another fabric and use it was the background for the March FMQ challenge.

I chose option #1:

Use the free FMQ tutorial provided by Patsy, from the 2012 FMQ Challenge, to create a FMQ Pillow adapting her border approach to your pillow design.  To clarify, you get to decide the number size of your pillow, the number of borders you wish to use, as well as which of the designs Patsy shared in this free tutorial, as you feel appropriate.

It was suggested that we sketch out our plan and practice first, but since this was my Plan B (and dangerously close to the end of the month), I just went for it.  Here are photos (front and back) of the quilting, before it was assembled into a pillow.

Quilted - before assembly into pillow

Quilting from the back

Monday, March 30, 2015

Making String Binding from Small Scraps

Ready to useAmi asked for a tutorial of how I was making the string-pieced binding.

Bonnie wondered why I was using such small pieces when–as I also mentioned in email to others yesterday–there are faster and more efficient ways to make it ...  though, to be honest, this 9-plus yards of binding came together pretty quickly.

I decided to post about my process, answer the questions and ... have a reminder for myself, if I ever want to do this again.

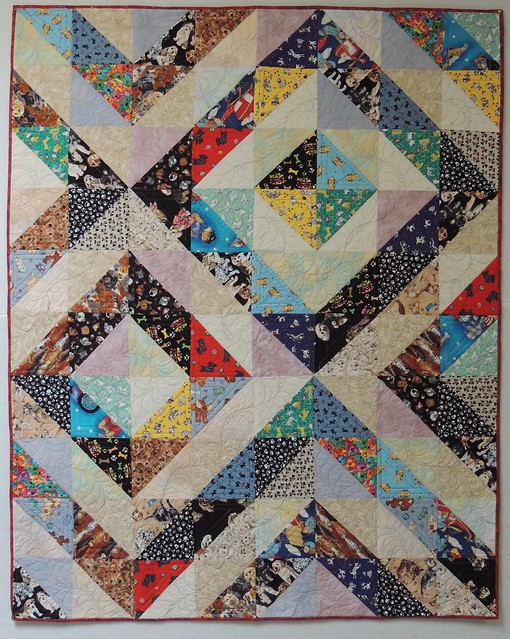
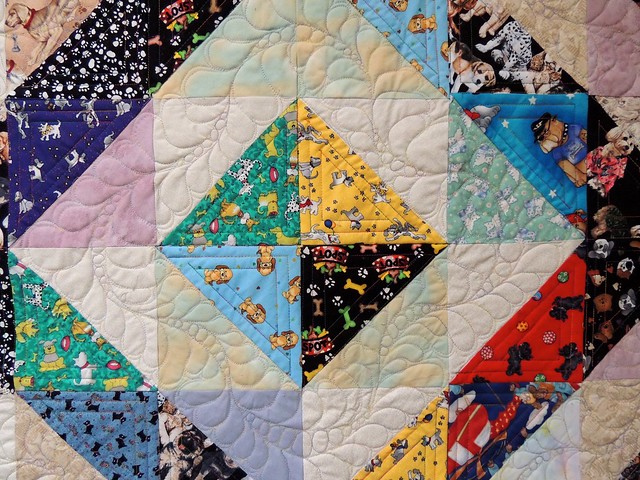
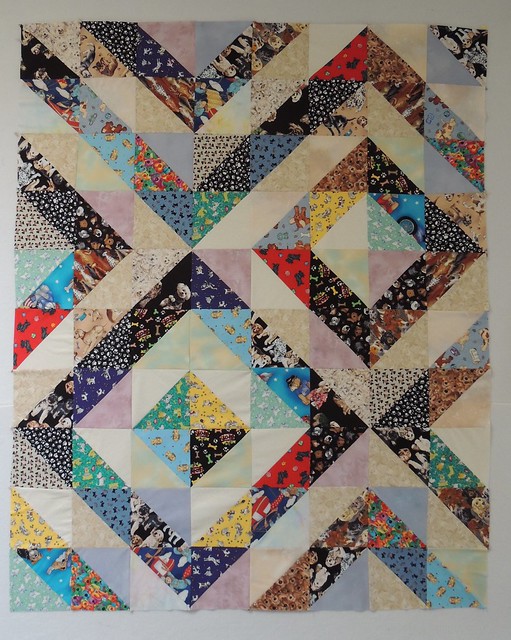
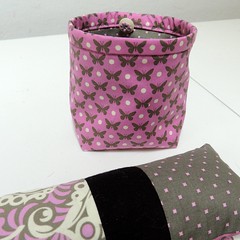
My initial inclination would be to make wider string yardage, like this, and cut the binding strips (on a bias) from it, just like any other fabric. The diamonds that make up the string stars themselves were cut from fabric I made in the same batch as this, during a stash/scraps clean out.

Last year, I made more string fabric yardage (in a more narrow color palette, using width-of-fabric strips) for my Feather Bed quilt.  (I know there's a photo on my blog of that fabric, but cannot find it). It really is the best (and fastest) way to go ...

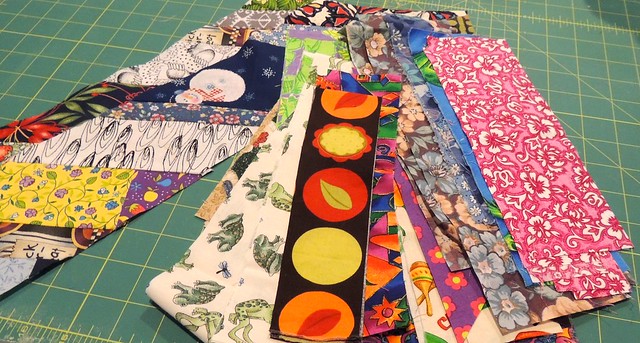
But since I ONLY needed enough string fabric for a binding, I got the idea to pull strings from my bins of small scraps.  Most of those are smaller than a 10 inch square.   At first I thought I could make a "double wide" piece from which I could cut two binding widths, but ... I soon realized that when those strips are put on a 45 degree angle that an 8 inch strip, with triangles cut from each end to create the angle, resulted in something around 4 inches wide.  My plan was for binding cut at 3 1/2 inches wide for a 1/2-inch wide double fold binding.

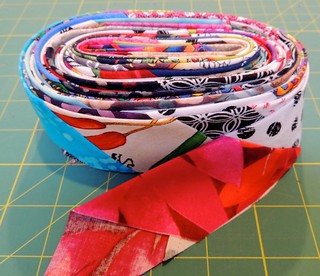
If you can make a wider piece of binding fabric using cut yardage or precut jelly rolls, I recommend you consider doing so. 

Being fully committed to using my smaller scraps, here's what I did.

I cut a pile of strips approximately 8-inches long in varying widths. The wider the strip, the longer the strip will need to be–more on that later.

Sew strips off-set I didn't exactly put them in a paper bag (to randomly pull them out and add them), but my process was similar.  I dumped them in a pile on my table next to the sewing machine and randomly grabbed and added, usually only choosing to which end of the pieced strings I'd add it.

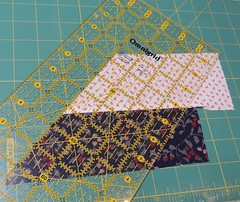
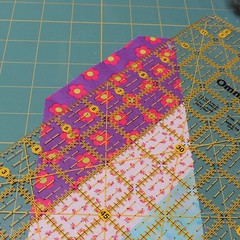
To begin,  align two strips along their long edges and offset on the left edge. Sew them together and press.

Now, using a ruler, cut this 2-unit piece into the shape and size.

Align the 45 degree angle line on the ruler with the bottom edge of the bottom strip and cut the angle on the left side.

Then cut the strip to slightly wider than the desired width.  For my 3 1/2-inch wide binding strips, I cut mine at 4-inches.

Use ruler to trim at 45 degrees 45 degree angle
Trim to 4-inches wide Trimmed with angles defined

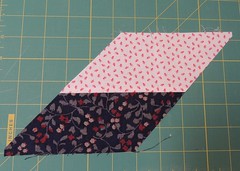
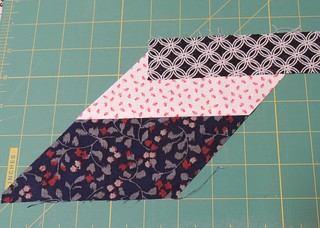
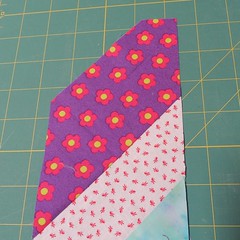
Once you have established the angle, all you need to do is add a strip, sew it on, press and trim.  When you add a strip, you align it on the left side, with the extra width on the right, like this.

Adding the next strip

As you continue to add the strings, you will see the how and why of "the wider the strip, the longer it needs to be." If a wide strip isn't long enough, you could end up with something like this, where, after it is trimmed, the point of the angle on the right side looks "chopped off."  If this happens, just trim it parallel to the seam. 

The wider the strip ... Even the edge

When you start, it seems like it could take ... forever.  I started with 5 pieced binding strips, so that I could chain piece them--making it a little faster.  I also thought that if I made them each approximately 2 yards long,  which wouldn't become too unwieldy and could be be folded into quarters to trim to 3 1/2 inches before I joined them together. 

When my chain-pieced strips became long enough, I would add a strip to one end, then pull the other end around and add a strip there as well.   I am a few inches shy of 6 feet tall (2 yards), which made eyeballing my progress easy: waist-high, shoulder-high, eye-level, over-my-head, done.

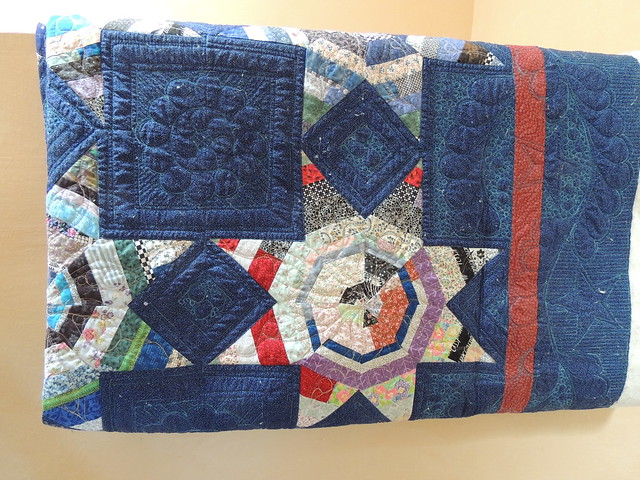
When I got close, I actually stopped to measure the quilt and figure out exactly how much binding I needed–328 inches, which is a little more than 9 yards, so I stopped before I reached my 5 strips over-my-head or 10 yards goal.  And a funny thing happened when I sewed it to the quilt–a binding miracle: it was EXACTLY the right size.

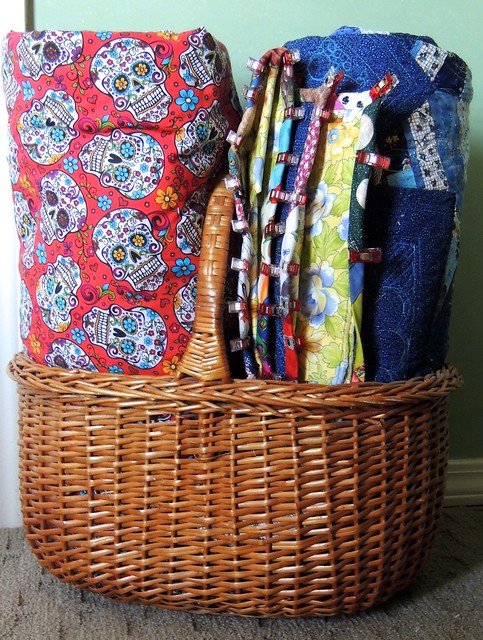
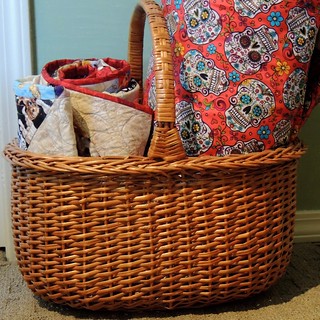
I started hand stitching down the binding last night while I watched television.  I truly AM a SLOW stitcher and have a ways to go.  It's now rolled up in the basket in the den waiting for me to return.

In the den

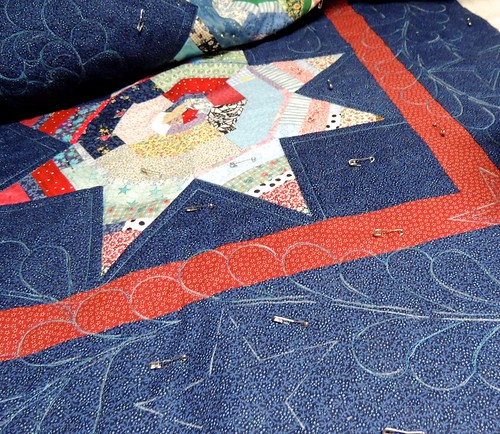
I probably used more clips to hold the binding in place than usual because of all the seams in the string-piecing. Every seam in the binding has a clip to keep it under control.

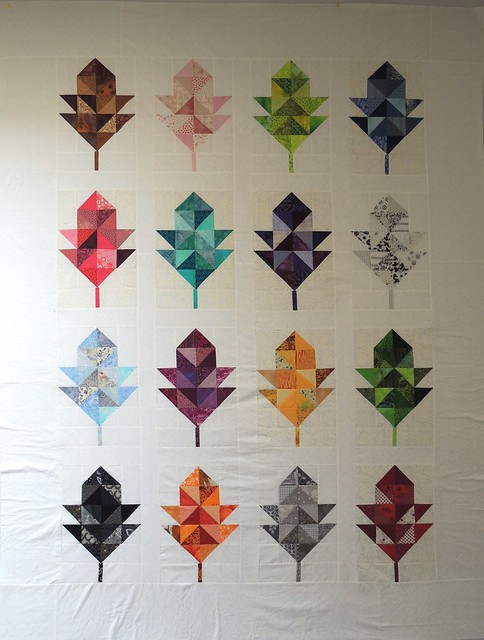
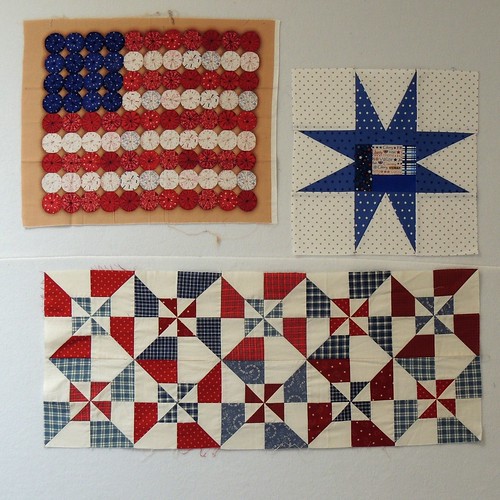
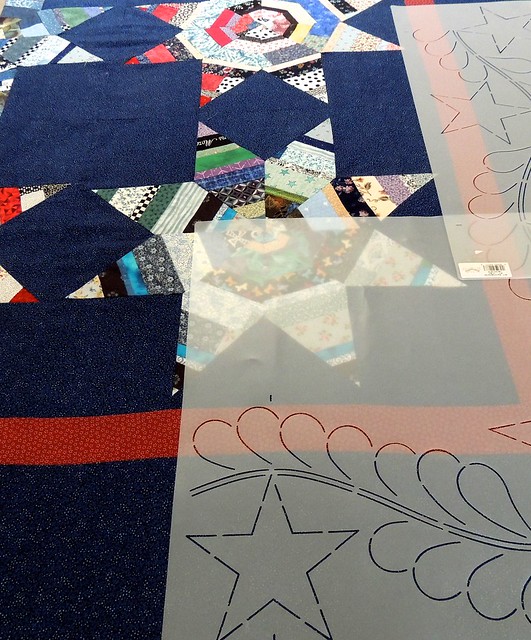
Since I cannot (yet) show you what's on my Design Wall (a super secret Cotton Robin project that won't be revealed until summer), I am sharing my process from work table and basket.
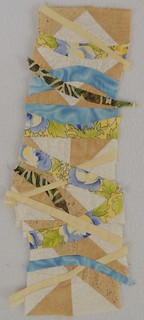
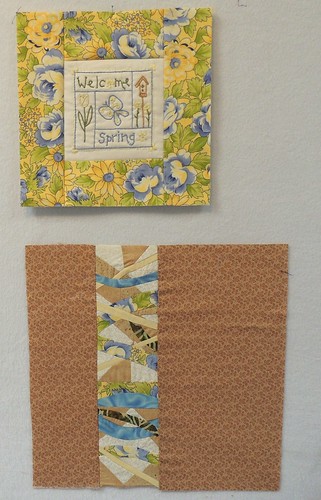
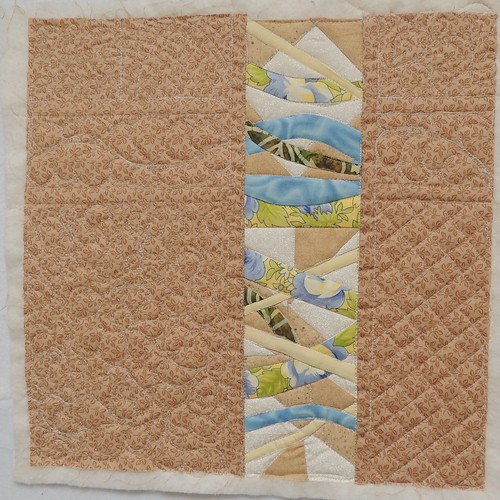
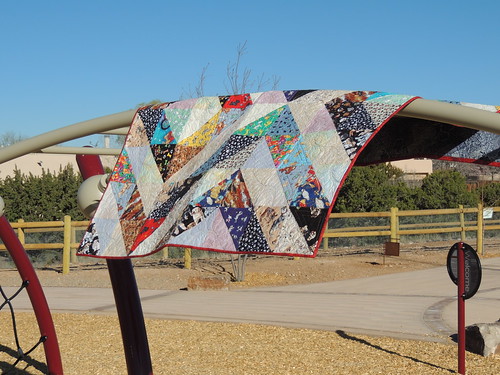
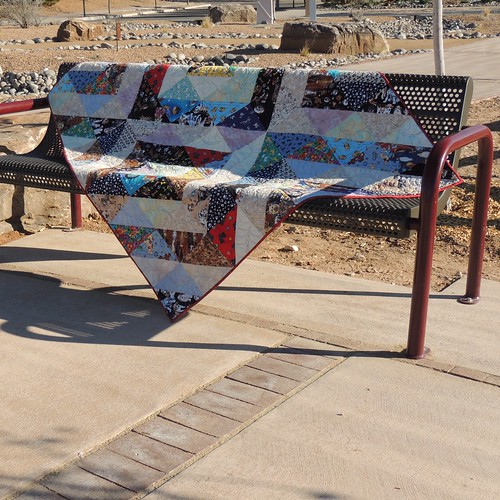
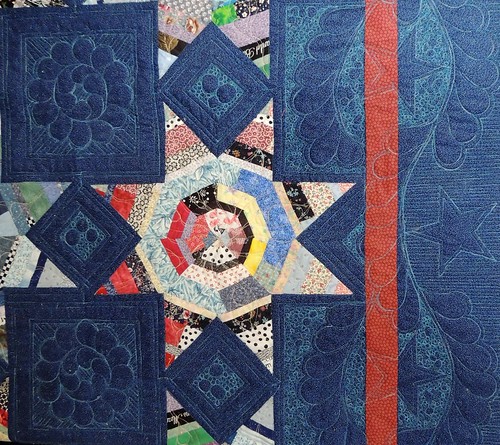
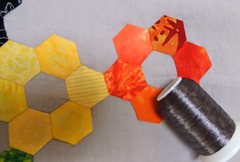
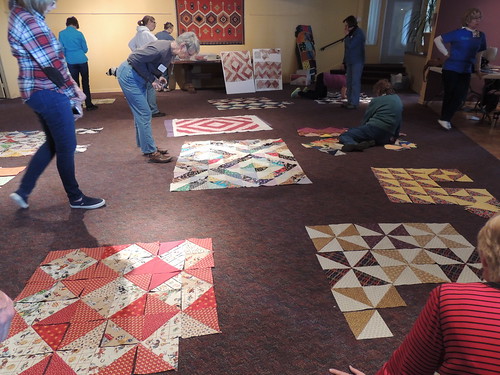
Sunday, March 29, 2015

This happened ...

I've finished quilting the string star quilt ... and decided it needed string binding.  And so, last night,  I started making the 10 yards of it I'll need. I didn't get very far ...

Making String binding

The binding made so far is on the left, the strings I have cut from scraps so far are on the right.

The "strings" for the binding are a bit wider than I used in the stars (to try to keep the thickness of all those seams to a minimum).  I will continue cutting strings from my scrap bins and sewing them together with a goal of spending my Sunday evening Slow Stitching down the binding.  Wish me luck!

Here's a peek at the quilt after it was washed–lint (from the exposed batting) and all.

After washing

Saturday, March 28, 2015

Spring Arrives in an Instant

It seems no matter where I have lived, when Spring arrives, it does so in an instant, like someone has flipped a switch somewhere and suddenly everything starts turning green and growing.  Despite my allergies to just about everything around here, I had to be outside in it–it was worth it ... though I am paying for it today (sniffle, sniffle, sneeze).

Yesterday, I enjoyed an afternoon coffee break on the roof deck ... and was surprised and a little startled when I noticed the snow-capped mountains in the distance ... apparently all that snow doesn't melt in an instant :-)

snow-capped mountains

Friday, March 27, 2015

March's Lovely Finish

The Oak Leaf quilt top been finished for a while, but I realized I never blogged about it before now.  I'm adding it to the list at the Lovely Finishes party.

Finished Oak Leaf Quilt Top

My goal was to make the additional blocks I needed and to decide on a setting.  I really liked the leaf blocks lined up like marching soldiers, so I went with a simple arrangement with sashing and borders in the same color as the background.  I am still thinking about quilting design (and thread color!) for this one--realistic oak leaves and acorns or something geometric with more triangles? 

Adventures of Outdoor Quilt Photography

At the neighborhood playgroundThere's a new playground in my neighborhood and lately, as I drive by, I keep thinking of taking my finished charity kid's quilt there for it's closeup. See that rope/climbing structure? I thought I'd find a way to place/hang the quilt on that.

I brought clips and pins, but nothing worked.

Failed Idea

The wind picked up so throwing it over the top of the monkey bars turned out to be similarly unsuccessful. 


Another failed idea

The quilt seemed happiest (and least likely to blow away) on a picnic table or bench. 


Playground bench

I'm really happy with my choice of the skinny red binding.   For those who like to see quilts flat and square, here it is, pinned to the design wall.

Finished Kids Quilt

Can I get a Whoop whoop, for at least trying to take photos on a windy morning at the playground?

I'm also joining the lists for:

Richard and Tanya's Link a Finish Friday
Fort Worth Fabric's Fabric Frenzy Friday
QuiltShopGal's Creative Goodness Linky Party
Simply Pieced's TGIFF

And how about a couple more photos of my playground photography adventure and some signs of spring around the neighborhood?

As a picnic table cover? Things are beginning to looks like spring
Signs of Spring Cool Stuff?

Thursday, March 26, 2015

Practice, Practice ...

The saying goes that practice makes perfect. I'm not sure that's exactly what's happening with the quilting of the golden oldie UFO string stars quilt.

Practice, Practice

Once committed to a couple of ideas, I kept going ... like with all that pebbling.  Now, I find myself still quilting practicing. I'm adding those parallel lines around the outside edge now. All that will be left is adding something in the red border in a different color thread (because I couldn't cover it in more of the teal/turquoise variegated thread.)

I'm not sure my pebbles have improved, but I'm a lot more comfortable using rulers now.

Updating to add a link to Angie's WIPS Be Gone list–this golden oldie UFO definitely qualifies–and to Lizzie's Free Motion Mavericks

Monday, March 23, 2015

Waiting for Inspiration ... on the Design Wall

Here is what's on my design wall today.

Design Wall - March 23, 2015

I have a plan for the blue star block (the first of a bunch made with the QOV mini group last week); the rest is there waiting for a plan to use them in Quilts of Valor projects.

For me, the design wall is not only a place to arrange and audition during the making of a quilt, but also a way of creating a focus of something I need/want to work on.  

Check out the other links for Design Wall Monday to see what quilters are working on and how they use their walls.

Sunday, March 22, 2015

Quilting Progress

I made a lot of progress quilting the string stars quilt during the Friday Night Sew-In.  Here's a peek at where I am now:

Quilting Progress on String Stars

I've quilted everything that's marked and done some straight line quilting (with the help of a ruler) to add some stitch-in-the-ditch and echo stitching in the spaces around the stars.  I've added some unmarked, much more typically "me," quilting in the star blocks–I haven't yet decided if it's too stridently different from those classic marked feather shapes. 

I will be adding some fill designs around the feathers and inside the plain squares. 

Waiting to be stitched and unstitchedIn the evenings, I've begun stitching down the red binding on the kids charity quilt –since I've already shared so many photos of that quilt in the last week, I'll show you how I stow quilts waiting for handwork in my den.  I expect to finish the binding on the little quilt today, as part of my Slow Stitch Sunday ... and I might think about unstitching some quilting on the other quilt that I started last fall, then decided it was wrong and needed to be ripped out ... 


Friday, March 20, 2015

Alien Feathers and Plans for a Friday Night Sew-In

I've marked the golden oldie string star quilt and started quilting it last night.  These marked feathers felt like alien feathers to me, they are so different from my usual–the unmarked, perfectly imperfect feather-like shapes. I have begun to wonder if anyone will see me in this quilt when I'm done.

Alien Feathers

I'm a roll with this, so my plan for tonight's Friday Night Sew-In, is to keep going ... it is also my current golden oldie UFO project, so I am joining Angie's WIPS Be Gone.  I'm joining the linky party there today, as well as Free Motion Mavericks.

Next up will the be the bright logs raffle quilt.  The quilting design will definitely not be marked.  I have pieced the back ... my cat Grace Hopper helped me measure the top for that effort.

Grace helps (again)

Whenever fabric or a quilt top is spread on my worktable, Grace will be there to help–she's a fiber-loving girl.  If the fabric or top is large enough to drop to the floor of my studio, her big brother, Johnny Be Good, will roll up in whatever touches the floor, making it difficult to move or adjust.  If I am quilting late into the night, both of them will join me on the sewing machine table and curl up on a piece of whatever I'm trying to quilt.  Both of them will no-doubt be part of my Friday Night Sew-in tonight ...

I'm sharing the photo of this quilt top to ask for your input on what color thread(s) you would use on this?  Help!

Wednesday, March 18, 2015

Scattered Progress

I've been working on a brand new project, a very old project, and a couple of projects you've seen before.

I resurrected another of my moldy golden oldie UFOs–a string star quilt top–pieced a back, and pulled out the stencils I planned to use for part of the quilting design.

Marking a Golden Oldie String quilt

I don't usually mark quilts and I think my fear of trying this is what has kept it unfinished for so long.  I decided that it's time to face this particular fear ... and do it anyway. If you have a favorite tip for working with quilting stencils and/or marking a quilt, I'd love to hear it. 

Softly Crinkled after washingSpeaking of fears ... it turned out that my fear about the dyes in the backing fabric for the kids charity quilt was unfounded.

It came through the wash fine and is now softly crinkled and ready to be trimmed and bound.  I am planning to use a red tone-on-tone print for the binding.


Planning to try a new threadAll the English paper piecing and hand appliqué on my little hex project is complete and it's ready to be quilted.  I decided to try this new metallic thread from Artistic in gunmetal.


First block for a scrappy QOV quilt
I think the best excuse for starting a new project (when you have a plethora of unfinished ones like me) is to make a quilt for a good cause.  I caught up with the guilds QOV mini-group and started a quilt that will be made from blocks like this one.

Lately, I have been feeling scattered and have allowed myself to flit from one project to another ... I am hoping it will end up resulting in a bunch of different kinds.

At least it makes for an interesting WIP Wednesday update ;-)


Tuesday, March 17, 2015

Just in Case ...

Late last night, as I finished up quilting the charity quilt from the guild sew-in, I noticed that the dye in the donated dark blue backing fabric seemed to be crocking and turning my hands blue as I was trimming threads from the back of the quilt.

I will wash it today with a few dye magnets and fingers crossed, but I first pinned it onto the wall and took a few photos of the quilt and the quilting, just in case that suspicious fabric bleeds and ruins my scrappy kid's quilt.

After quilting

My philosophy when it comes to quilting is that every quilt is practice for those that follow it ...

In this quilt, I was playing with a variation of my go-to big loopy feathers in the "lights," using a pastel multicolor variegated thread. In the "darks," I practiced some simple straight line ruler work, using another variegated thread that is darker/brighter. Both spools of thread were secret sister gifts at a retreat that happened far away and long ago–it was a good opportunity to use them up.

Quilting Detail

(You can see an even closer look at the good, bad and ugly of my quilting on Flickr here and here.) 

I mentioned in my Sunday post that, of all the ways you can make triangle squares, the method we used here was my least favorite because you end up with half-square triangle (HST) units that have bias edges on all four sides.  (You can read more about making HSTS in many way in my HST tip sheet).

For me, the stretchy bias wasn't too troublesome when I was putting together the top, but it definitely  did become an issue when I was layering/basting the quilt and later, as I was pushing it around to quilt it. Borders would have helped mitigate the stretchiness around the edges and I considered adding them, but realized that if I did, the quilt would be larger than the batting and backing fabric I'd been given to use for it.  

 If you've seen that YouTube video of the 4-at-once technique, you can see that it's a method that demos well and, has a cute gee-whiz factor ... though the fact that you are dealing with all those bias edges is never mentioned.  Your mileage may differ, but, for me,  this was the first and last time I'll ever make HST units this way ... or any other of those gee whiz block techniques that similarly end with blocks with bias edges.  I hope that washing the quilt will also help some of those stretchy bits will relax and shrink back to their original proportions.

I'm joining QuiltShopGal's #CreativeGoodness Linky Party.

Monday, March 16, 2015

Hand 2 Help Challenge

Confessions Of A Fabric Addict
Since I seem to be a rare finishing state of mind ... I'm joining the Hands 2 Help Charity Quilt Challenge on Sarah's Confessions of a Fabric Addict blog.

I am planning to finish quilts (and probably start at least one) for Happy Chemo–one of three designated charities for the challenge this year.

But first,  I need to finish the kids charity quilt I started this weekend and make one from the kit of coordinated fabrics I grabbed at the guild's sew in last weekend ...

Sunday, March 15, 2015

Quilting with Friends

Yesterday (Saturday), the Northern New Mexico Quilt Guild (NNMQG) met to sew kids charity quilts. The quilt pattern was a bit of a mystery for which kits were supplied, or you could–as I did–bring a stack of 10 inch squares: 20 lights and 20 darks. I had a stack of 10 inch squares from a fabric exchange of dog-themed fabrics and thought they would make a fun kid quilt. Most of them are "darks," so I added some low volume and pastel squares to the "lights" to take along.

I am undeniably a control freak when it comes to the quilts I make ... I have to push myself to let go of my controlling ways and suspend disbelief for any kind of mystery quilt, but I persevered and ended up with, what one of the guild members characterized as an "old fashioned scrap quilt."

Today, it's what's on my design wall.  It is, undeniably, an anything-but-modern scrap quilt ... though in a different fabrication, I think the layout could be quite modern.  I have decided to choose to believe that the diverse fabrics make it one of those quilts that becomes more interesting as you get close enough to enjoy all those doggy fabrics and that it will be loved by the dog-loving kid that claims it.

Old-Fashioned Scrap Quilt?

And the ever-analytical me is thinking about how the fabrics I chose to combine with the mostly bright and bold dog prints resulted in that "old-fashioned scrap quilt" feeling.

The directions were dead easy–match light/dark squares and use the 4-at-once method to make Half-Square Triangles and then ... arrange as desired. Millie, our fearless leader for the effort, brought examples of possible layouts and one large quilt top she had made using this technique.   I confess this method of making triangle squares is my least favorite–mostly because you end up with HST units that have bias edges on all four sides ... but I continued to suspend disbelief and just did it. (If you are curious, you can find details of this method and some of my favorites in my free, downloadable HST tip sheet.)

At the end of the day, we laid out our in-progress quilts on the floor in the middle of the room and had a walk-around to enjoy our collective accomplishments.

Admiring our progress

To anyone who is not a quilter, the effort it takes to pack up everything you need for a few hours of quilting with friends could seem a little crazy ... and not at all worth it.  We bring sewing machines, extra lighting, seat cushions (or sometimes a good chair), portable sewing machine tables, rotary mats, cutters, rulers, specialty templates, thread, pins, scissors, snips, seam ripper–the last of which I was glad I remembered because dyslexic me ended up ripping out and re-sewing one square three times before I got it right ;-)   I didn't bring an ironing board and iron, but wished I had, because quilters were queued to press all day long and an additional ironing station would have been a good idea.  The charity quilts committee were also shlepping kits, idea boards, instruction sheets, backing fabrics for the quilts we would make and a giant roll of batting. 

When I looked around the room, it was clear the quilters in the room were happy to have made the effort–Sandy and Fran's big smiles were pretty typical of those around the room. 

Sandy and Fran - Happy to be quilting with friends

Whatever the effort to gather and carry everything you need, it aways seems to make us happy to be  quilting with friends.   (Plus it was a good dry run for getting organized for for the upcoming guild retreat next month.)

I'm joining the lists for Oh Scrap! on Cynthia's blog, Quilting is More Fun Than Housework,  and Judy's Design Wall Monday. 

Catching up with (slow) handwork projects

Completed embroideryThe sweet Welcome Spring embroidery that I started a week ago is complete.  (Gail Pan's free pattern is available here.) I've been thinking about some improvisational pieced borders ... but haven't yet made any forward progress on making/adding them.

This finish is timely... it is definitely beginning to feel like spring around here.

I have made some progress with the hex rings and have now moved onto the next step–appliquéing them to a background.

I have been working on these projects slowly, by hand, in the evenings while I watch (probably too much) television.


Appliquéd in placeThe process is relaxing, meditative and gives you lots of time to let your mind wander and think about things like how I will quilt this little piece.

Last night, it was an opportunity to get my creative mind to calm down after a day of sewing with the Northern New Mexico Quilt Guild–come later today to read about that adventure :-)

Last night while I was stitching away, I had a new idea for the quilting design–it was an a ha moment and now I feel ready to jump into quilting this ... as soon as I finish the slow stitching needed to finish the appliqué.  So that's what I'll be doing for Slow Stitch Sunday.

Do some aspects of quilting wind you up or help you unwind?

Friday, March 13, 2015

Weighted Pincushion Organizer

This falls in the category of, "I always wanted to make one of these," and so I finally did.

Pincushion - Threadcatcher - Organizer

I used a pattern by Elizabeth Hartman, offered on the Sew Mama Sew blog a few years ago.  (You can still download the free PDF from the linked post.)

The scrap bag is attached by a button.  I found a small ceramic flower button that was a nice color match, but too small, so I stacked it on a larger plain button to make it work. The bag will also work separately and will sit on it's own.


Thread Catcher    Stacked Buttons

The big pincushion has a wool strip in the center for needles and is weighted–I used crushed walnut shells–to balance on the edge of a table or arm of a chair.

My guild has a sew-in tomorrow to make charity kids quilts.  The quilt pattern will be reveals when we get there–we were asked to bring stacks of light and dark 10-inch squares and a sewing machine with a walking foot.  Normally, I'd take my featherweight to sewing days like this, but because of the walking foot requirement, I pulled my Singer 301 out of it's cabinet, thinking I'd take it ... until I realized that the power cord was missing.  Hmmm.  How did I manage to lose it?  I guess I'll spend the evening turning the studio upside down to figure out what I did with it when I last re-arranged and moved the sewing cabinet ...

Update: after giving up on finding the power cord and learning from Brenda that I could use the combined foot pedal/power cords from my Featherweight, I found the original ... IN the cabinet, just where I put it away :-)

In the meantime, I'm including this finish on these lists:

Richard and Tanya's Link a Finish Friday
Can I Get a Whoop Whoop? on Confessions of a Fabric Addict
Fort Worth Fabric's Fabric Frenzy Friday
QuiltShopGal's Creative Goodness Linky Party

Related Posts Plugin for WordPress, Blogger...