A beautiful video reminder to embrace life and wear your seat belt from the UK . . . too bad the video was too wide to display within this blog template :-(
Embrace Life
It's worth a click to check it out.
Thursday, June 10, 2010
Monday, June 07, 2010
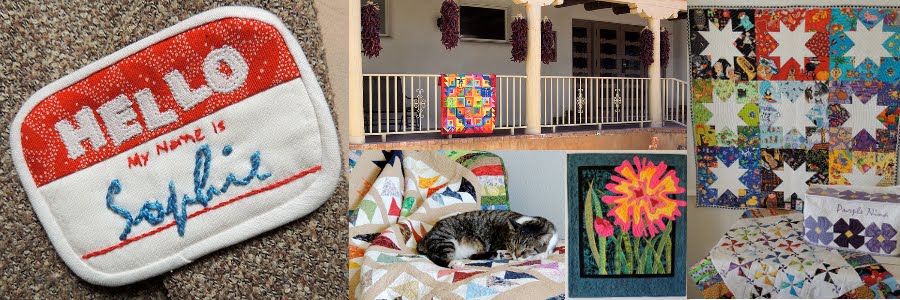
Design Wall and the Process Pledge
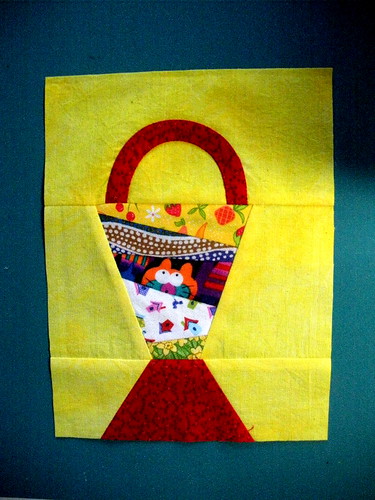
The June Lotto blocks on my design wall feel very familiar . . .
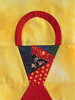
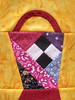
Because four of them have been hanging out there for a while, waiting for June to arrive ... except until a couple nights ago, the three in the middle were re-made in different colors.
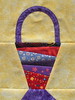
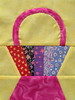

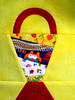
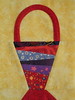
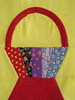
you can click any of the individual photos for a larger image. Obviously, I started with one idea for the color guidelines for this month's liberated basket blocks and then changed my mind ... and as much as I dislike ripping apart things and re-doing them, I liked the blocks enough to save them from the orphan pile and turn them into lotto blocks.
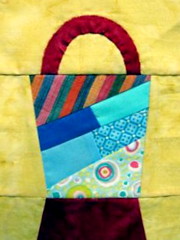
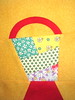
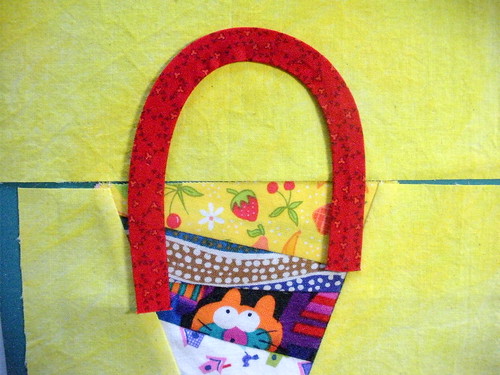
 The first four blocks were made as I took photos so I could describe how I approached this block and then, tested the limits of the necessarily loose instructions for making the scrappy liberated basket block.
You can find my directions for making this block here:
Liberated Basket Block Step-by-Step
When a couple people were seemed to be struggling with the bias handles on the baskets, I tried to show my process, including swirling the handle, a technique I learned when making hats: the grosgrain ribbon used inside the hat is swirled so that it fits smoothly inside the hat and against your head. You can find those tips blogged here:
Vines & Handles: A Closer Look at Bias Strip Appliqué
One of the things I love about quilting is that there are a lot of ways to create the same block or quilt (or something that is very close). The Block Lotto is one way that I share my process for designing and making blocks. Modern technology makes it easy to share with friends and others when you can't show or teach something face-to-case. I love reading blog posts where authors show their processes and so I was happy to discover the process pledge:

Click the image to learn more and explore the list of those that have taken the pledge to show how they work.
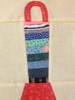
Since this is Design Wall Monday over on Judy Laquidera's blog, I'll share the virtual design wall made from the photos of 30 of the blocks made for the block lotto so far. (As of this morning, 75 blocks have been made for this month). Design Wall Monday is another way in which quilters show a piece of their process–the work-in-progress on their design wall.

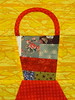
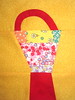
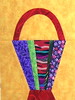

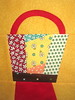


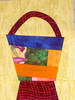
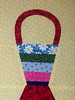


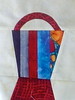
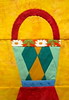

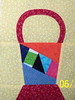
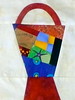

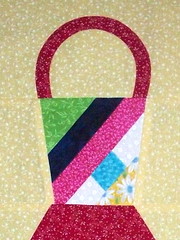


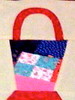
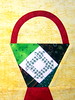
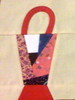
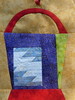
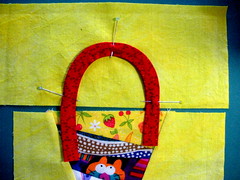
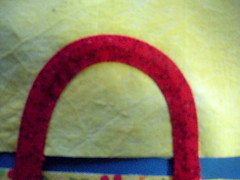
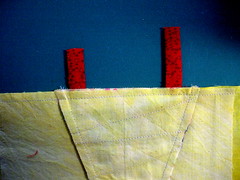
You can decide for yourself whether my decision tomake the handles and baskets of the blocks from red fabric was a good one.
Because four of them have been hanging out there for a while, waiting for June to arrive ... except until a couple nights ago, the three in the middle were re-made in different colors.
you can click any of the individual photos for a larger image. Obviously, I started with one idea for the color guidelines for this month's liberated basket blocks and then changed my mind ... and as much as I dislike ripping apart things and re-doing them, I liked the blocks enough to save them from the orphan pile and turn them into lotto blocks.
The first four blocks were made as I took photos so I could describe how I approached this block and then, tested the limits of the necessarily loose instructions for making the scrappy liberated basket block.You can find my directions for making this block here:
Liberated Basket Block Step-by-Step
When a couple people were seemed to be struggling with the bias handles on the baskets, I tried to show my process, including swirling the handle, a technique I learned when making hats: the grosgrain ribbon used inside the hat is swirled so that it fits smoothly inside the hat and against your head. You can find those tips blogged here:
Vines & Handles: A Closer Look at Bias Strip Appliqué
One of the things I love about quilting is that there are a lot of ways to create the same block or quilt (or something that is very close). The Block Lotto is one way that I share my process for designing and making blocks. Modern technology makes it easy to share with friends and others when you can't show or teach something face-to-case. I love reading blog posts where authors show their processes and so I was happy to discover the process pledge:
Click the image to learn more and explore the list of those that have taken the pledge to show how they work.
Since this is Design Wall Monday over on Judy Laquidera's blog, I'll share the virtual design wall made from the photos of 30 of the blocks made for the block lotto so far. (As of this morning, 75 blocks have been made for this month). Design Wall Monday is another way in which quilters show a piece of their process–the work-in-progress on their design wall.
You can decide for yourself whether my decision tomake the handles and baskets of the blocks from red fabric was a good one.
Sunday, June 06, 2010
The Word of the Day is Sweet
 It was a sweet day at the Farmers' Market yesterday, as the vendors offered up sweet slices of fruits and vegetables, often served on the tip of the long knives used to do the slicing. I enjoyed samples of peaches, watermelon, tomatoes, mangos, pineapple and more and brought home a couple tote bags full of all of sweet, ripe produce.
I bought peaches from this gentleman. There was no doubt that this guy grew and picked them.
In the times we live in, I think it's easy to forget how letting things ripen on the vine or on the tree and eating them soon after they are picked makes them taste so much better . . . and yes, sweeter.
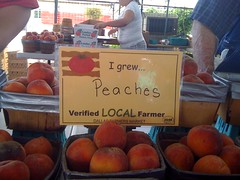 Here's a closer look at the signs that are popping up now, a sign that summer has arrived in Texas and the sweet taste of fresh local produce has begun.
 But I confess I had to smile a little when the collard greens I bought were described as "sweet." I was wondering how much stronger than my preferred green ingredient, kale (which I have never found at the farmers' markets here), they will taste when juiced . . . and remembering a less-than-wonderful experience a few years ago when I juiced some mustard greens.
Saturday, June 05, 2010
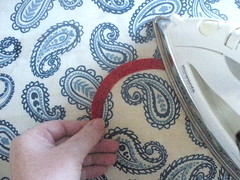
Vines and Handles: A Closer Look at Bias Strip Appliqué
I put these tips together for the Block Lotto, to help everyone produce nice flat curved handles for their Liberated Basket blocks. This technique works for any bias appliqué strips: stems, vines, branches etc.
When it comes to quilting, we are usually taught to avoid working with bias edges, using STEAM when pressing and pulling/contorting our fabrics. But sometimes, all of these things can work for you to achieve the desired effect.
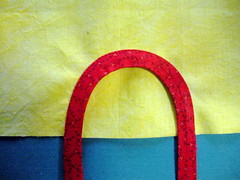
Here's a closer look at the steps for making the basket handle. Click any of the photos for a larger image and add your own tips in the comments.
When it comes to quilting, we are usually taught to avoid working with bias edges, using STEAM when pressing and pulling/contorting our fabrics. But sometimes, all of these things can work for you to achieve the desired effect.
Here's a closer look at the steps for making the basket handle. Click any of the photos for a larger image and add your own tips in the comments.
- Be sure to cut your strips ON THE TRUE BIAS. Do NOT fudge on this step. Align the 45 degree line on your ruler with the selvedge or cut edge of your fabric to find the bias line across your fabric.
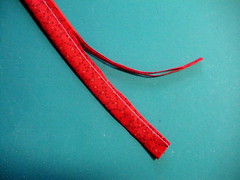
- Sew the bias strip into a tube by sewing the two long edges together, WRONG SIDES together. Don't even finger press the fold and you won't have to worry about getting rid the crease you create. Thread color doesn't matter (notice my not so "neutral" light gray.) After you've sewn the seam, trim away the seam allowance as close as you can to the seam–after the bias is in place, there will be no stress on that seam.
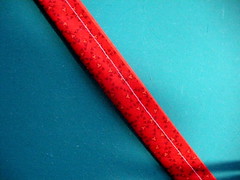
- Now, carefully prepare the sewn bias strip. Roll the seam and it's tiny seam allowance between your fingers so that the seam is in the middle of the strip. Take the strip to the iron and press it firmly so that it is VERY flat.
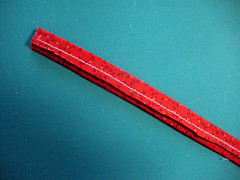
- Next, using the STEAM in your iron, "swirl" the strip. This technique I learned when making hats. It's how you create the shape of the grosgrain ribbon that rests against the head inside the hat. Since your head isn't a cylinder, the ribbon needs to wider at the bottom than the top, by swirling the ribbon into a slight curve, you create a ribbon that measures longer on one side than the other and fits beautifully inside a hat and against the head.
It works like this: using a STEAM iron in one hand to anchor one end of the strip to the ironing board and holding the other end of the strip in your other hand to manipulate the strip. As you press along the length of the bias strip, you'll be stretching one edge slightly to create a curved shape.

Depending on the angle at which you pull the strip around, you coulcome very close to creating the shape you want for your handle at the ironing board. I was able to completely form my handle at the ironing board.
- Pin the handle in place, focusing on the OUTSIDE of the handle first. Use as many or few pins as you need. If you are stitching your handle down on the machine, be sure to remove the pins as you come upon them.
- When machine stitching the handle, be sure to use a thread color that matches or invisible thread. Use an open sewing machine foot that will allow an open view of the needle/seam and the edge of the handle. If you can change the needle position on your machine, take advantage of that feature to sew as close to the edge of the handle as you can. On my little Bernina (153 QE), I used a #10 appliqué foot and moved my need to the far right.
If you are using a straight stitch, as I did here, you want to be close to the edge while staying on the bias strip If you are using a blind stitch, blanket stitch or zigzag, you'll also want to be close to the edge, but stitching along the background (and zigging into the handle).

- After you have stitched down the outside, you may notice that the background has pulled in a little. You also now have an opportunity to work on the inside curve with the STEAM iron. so, press the strip again, with STEAM, starting with the curviest part of the handle works the excess fabric into the straighter/more gently curved areas so it doesn't get tucks in it. Pulling the edge down/pressing towards the bottom of the block rather than perpendicular to the stitching on the outer edge shortens the fabric in the inside curve to help it lay smoothly as well.
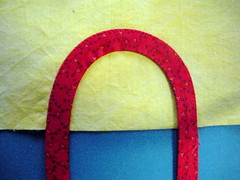
- When you have pressed and manipulated the handle so that it lies flat, you're ready to stitch down the inside curve. Once again, you want to sew as close to the edge as you can. Upon close examination, your stitching will highlight the beautiful, smooth curve (with all edges appearing to be turned under– something I learned to think about in a Jane Sassaman workshop from some years ago.
Once your handle is completed, attach it to the bottom of the basket block, trimming the excess length of handle even with the fabric edge. I generally sew first and trim later to ensure that the ends of the strips don't have any possibility of folding up and getting in the way in the seam and . . . not lying flat when I'm done.
Subscribe to:
Posts (Atom)